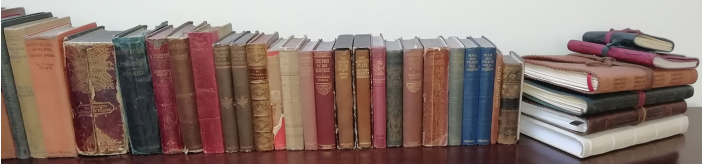
Here's a selection of books I've repaired to give you an idea of what can be achieved.

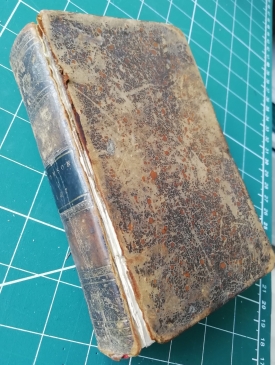
Wilson's Tales from the Borders
Poetical Works of James Thomson
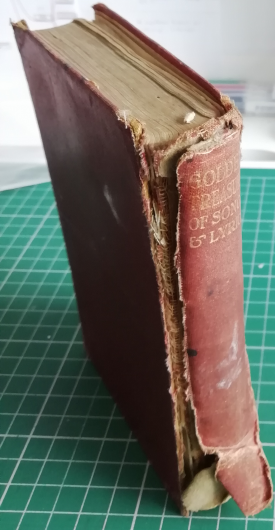
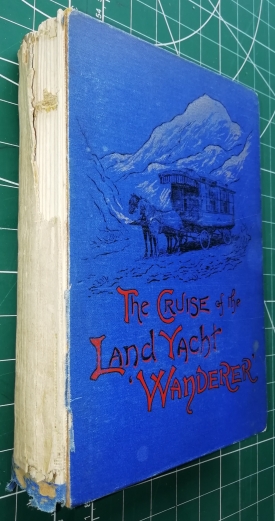
The Cruise of the Land Yacht "Wanderer"
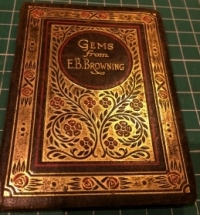
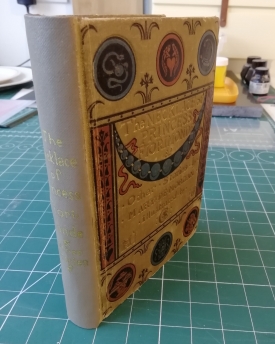
The Necklace of Princess Fiorimonde & other stories
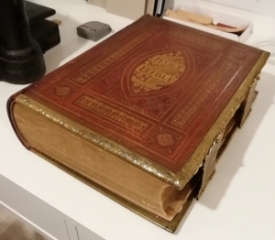
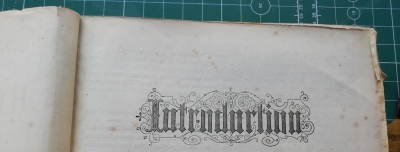
Cassell’s Illustrated Family Bible
Cassell, Petter & Galpin circa 1877
This commission was a repair to a family bible from the late 19th Century, given to the owner’s great grandmother for her wedding. It is a lovely example of the Illustrated Family Bible with the text from the Authorised Version (i.e. King James), having over 900 painstakingly engraved illustrations. It is bound in red leather with extensive gold tooling and an ornate brass frame and clasps.
The published date isn’t shown, but it matches another copy found dated 1877 which was valued at around £160.
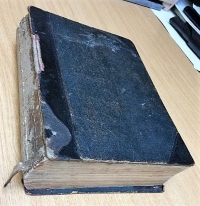
Damage Assessment
- The case was completely detached from the text block.
- The brass frame was distorted with the clasps bent and framework stretched out of shape, coming away from the front board.
- The front leather hinge was split about one third of the way along, showing signs of ‘red rot’ (i.e. the leather was completely dried out and crumbling).
- The first few signatures were coming loose at one end as the stitching had come away from the cords, causing damage to the very thin paper where the stitches pass through (a signature is a group of papers stitched together, usually between 4 and 8).
- The first few pages were completely detached and edges crumbling away.
- Various tears and holes throughout, but majority of stitching is intact, and the spine bonding is still strong.
- Head band loose at the ends and fraying.
- Due to its size internal hinges of book cloth had been used instead of full endpapers – these were intact but worn so once reassembled wouldn’t provide sufficient support for the weight of the book.

Repair Process
The first step was to secure the loose signatures to avoid further damage. This was trickier than usual, as removing the signatures completely would have meant having to remove the old glued backing material, which was quite thick, and there was significant risk of damaging the already fragile papers as well as causing the work required to exceed the value of the Bible. Instead I was able to stitch individual pages and, in some places, whole signatures back onto existing secure threads or onto the original cords where exposed. The more severely damages areas were guarded with Japanese Kozo paper (very thin tissue paper but very strong).
For the crumbliest of pages, I used Kozo to protect the edges and prevent further damage, as well as providing a firm edge to be able to glue them back in (the first few pages of such volumes are glued in rather than stitched).


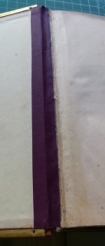
Once this was all dry, backing paper was applied over the spine to reinforce the new stitching and help to retain the curve of the spine. This was covered with a piece of book binders mull (non-fraying canvas) that will form the main hinge to the boards.
This was then covered with a further piece of backing paper (There is a lot of weight to support, whilst remaining flexible enough to open and allow the pages to fall into the desired curve). The hinges were preserved by using kebab sticks pressed into the gap between the boards and the spine.


First task on the case was to repair the distorted brass frame and clasps.
Normally these can be removed as they are held on with tiny pins and glue.
However, this particular binder had decided his frame was not going to come off, as he had riveted the frame in place instead. This meant I couldn’t take the frame off without causing further damage.
Instead I resorted to clamping the case down and then gently hammering it straight with a wooden block. The result was better than anticipated.

Next step was to repair the casing ready to accept the book block.
As the leather hinge was worn and torn, I prepared a thin piece of leather to sit under the old leather to support the hinge. To function properly, this needed gluing tight into the case hinge space. Plenty of glue and some creative clamping soon sorted this out.


Once I was satisfied this would take the weight of the Bible (over 10lbs) came the next tricky bit – gluing the new mull to the casing. Great care is required here to ensure the mull gets right into the hinge space, otherwise it will lift the first few pages when opening. More creative clamping required here.


Once this was all dry, I fitted new internal hinges from strips of matching book cloth to protect the outer pages. I was pleased to find an exact match in my existing stock.
It had been necessary to remove the outer blank pages during the repair process (these are the ones that are edge pasted rather than stitched) so these were duly reattached.
The final part of the process was to treat ‘the red rot’ on the old leather hinges. To return some suppleness I used a leather balm to treat the affected areas. This was followed up by using an atom wax to clean and bring out the lustre of the leather.
Notes on further care
When opening a book of this weight, the ideal way is to stand it in its spine, open from the middle and lay both sides down together, then work outward to the pages you want. This reduces the stress on the spine.

Brian Pollitt Artisan Crafts October 2019.
| Visitor Counter: | |||||||
 | |  |  |  | | ||