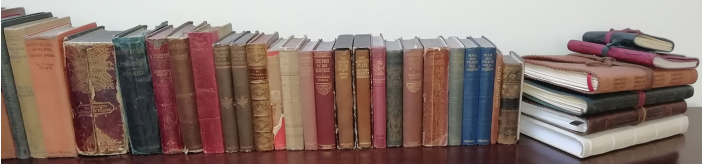
Here's a selection of books I've repaired to give you an idea of what can be achieved.

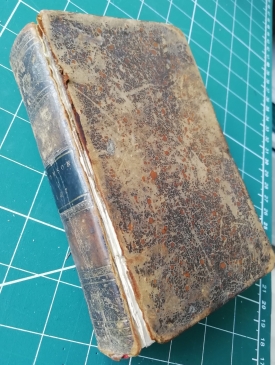
Wilson's Tales from the Borders
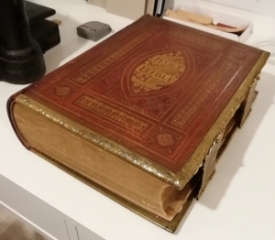
Poetical Works of James Thomson
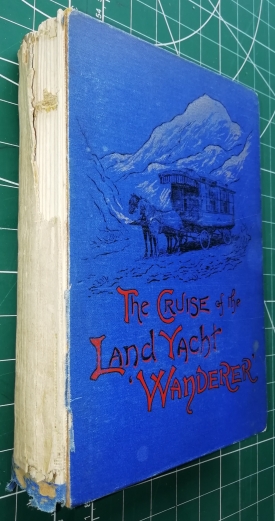
The Cruise of the Land Yacht "Wanderer"
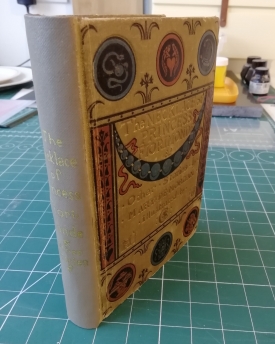
The Necklace of Princess Fiorimonde & other stories
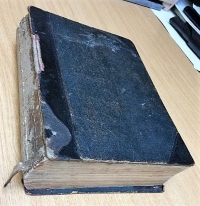
The Golden Treasury of Songs & Lyrics is a selection of songs & lyrical poems collated and arranged with notes by Francis T Palgrave, Professor of poetry at Oxford University 1885-97. This was in a box of books that I bought for 50p that belonged to the Foxon family in the 1940s.

<< From this...
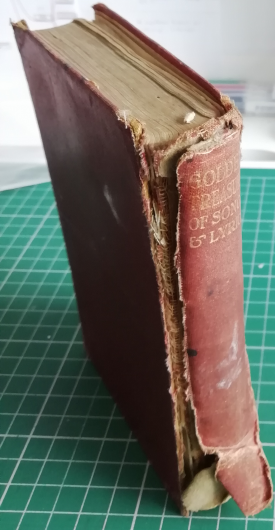
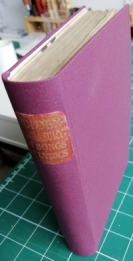
To this >>

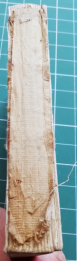
- Spine 3/4 detached, badly frayed & crumpled, worn & stained.
- Book cloth badly stained front & back.
- Hinge almost completely disintegrated.
- Endpapers torn front & rear.
- Corners rounded & worn through bookcloth.
- First few pages detached (traditionally glued not stitched).
- Stitching sound, if a little loose on first signature.
- P503 torn out, stained and wrinkled and badly deteriorated.
- P117/118 missing.
- Extensive markup in pencil & ink - study notes.
- Ink stains throughout.
First task was to remove the case. As the book was of no intrinsic value, and the endpapers too flimsy to be able to steam off, I decided to make a new case. This was done by carefully slicing the old mull and tapes down the hinges.


A new piece of mull was needed to fasten the block to the boards, so the old one had to be removed. The glue holding it in place was brittle, so needed to be removed. Sometimes it can be chipped off, but there is a danger of damaging the stitching if not careful. The safest way is to brush some new watered down paste onto the old in order to soften it up. The old materials can then be carefully lifted. Paste works better than water as there is less chance of it seeping into the pages.


The stitching could then be more closely inspected and was found to be sufficiently intact to not need redoing. New mull could then be attached to the clean spine, using PVA glue. A piece of wrapping paper was applied over the mull to support it and stop it stretching when the book is opened.
This was then left to dry.

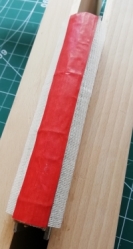
Next step was to make the new case. I tried removing the old book cloth, but the boards were perished so new ones were cut to size, along with a thinner piece to support the spine. The new boards were 1mm grey board; the spine support was 100 gsm card. The cloth was quite old, the nearest match being a burgundy Edinburgh book cloth from J Hewit which I had in stock.


The most important part of a book design is the hinge, so to ensure the dimensions worked, it is helpful to hold the case materials in place and then wrap a piece of bookcloth around the book & boards in order to mark out the hinge spacing. I find it helpful to make a template so I can glue everything up accurately.
The book block was then attached to the boards. For a heavier book, supporting tapes or chords can be used, however this was a light book, with strong mull and I planned to use quite a thick endpaper too, so opted not to use them. Care is required when gluing up the mull not to let any glue get onto the actual spine so that it can remain open.


The glue can also soak through the paper so a sheet of plastic was inserted to prevent the adjacent pages from sticking together. The block was held upright during the drying process to avoid any accidental sticking.
Endpapers are used to cover up the folded book cloth and mull, and are also an integral part of the hinge. They are the trickiest part of the assembly, as the whole piece needs to be glued in one go otherwise one gets wrinkle / stretch marks, so it can be a bit of a faff not letting the half that fastens to the endpapers catch until you've got it in place on the first board. I cut to size on the half sticking to the board, but leave the side sticking to the book block a little larger and then trim to size after, as it only needs the book block to be a fraction of a millimetre out of square to misalign the piece sticking to the first/last pages.

It is also really important to ensure the endpaper is pushed right down into the hinge otherwise it will tear the first time the book is opened. Use a bonefolder for this.
I didn't have a similar font type set for the title, so I opted to cut out the old title off the spine, trim it and then glue it onto the new one.
And finally, the book was pressed in the nipping press overnight to even out any warpage created during the gluing processes.

Brian Pollitt Artisan Crafts September 2019
| Visitor Counter: | |||||||
 | |  | |  |  | ||