
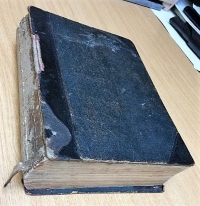
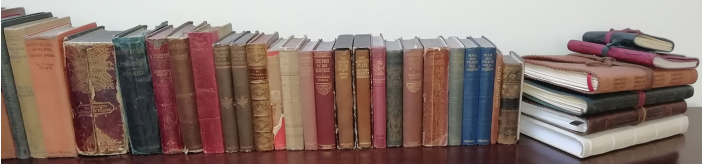
Here's a selection of books I've repaired to give you an idea of what can be achieved.

Wilson's Tales from the Borders
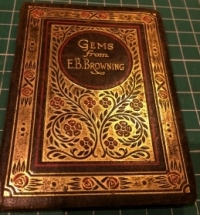
Poetical Works of James Thomson
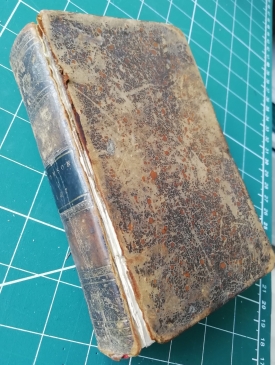
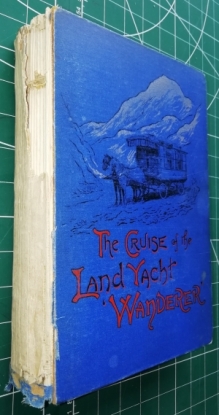
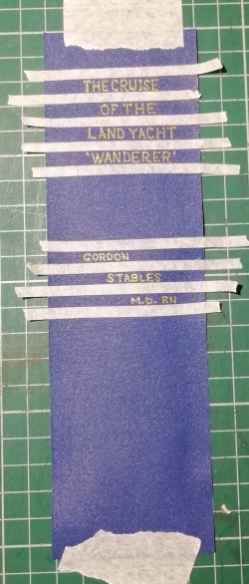
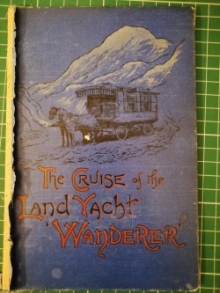
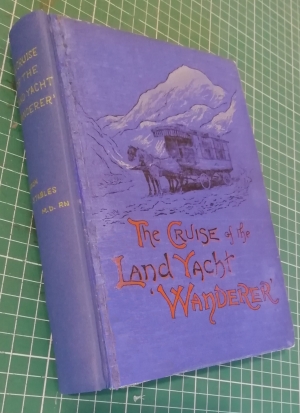
The Cruise of the Land Yacht "Wanderer"

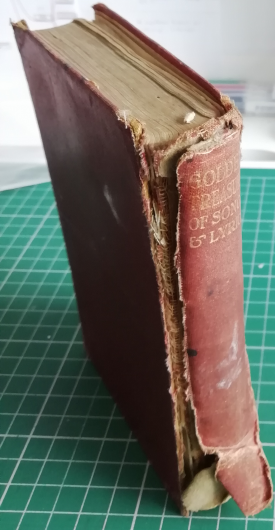
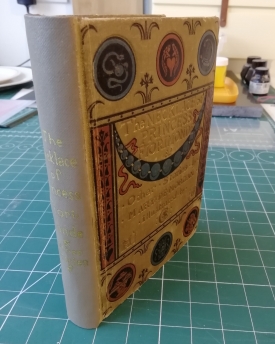
The Necklace of Princess Fiorimonde & other stories
The Cruise of the Land Yacht "Wanderer"
By Gordon Stable M.D. RN
Published by Hodder & Stoughton 1892
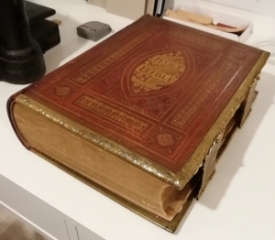
This is an interesting book about travelling around the UK in the forerunner of the luxury caravan - this one being 2 horse-power - literally. The repair was a commission for a friend and although not a first edition, would still be quite valuable in good condition.
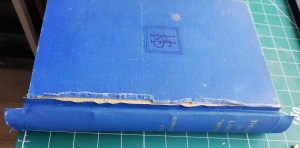
Damage Assessment
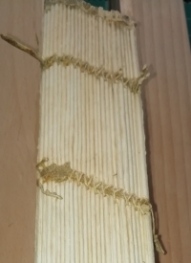
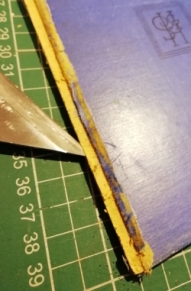
Spine detached and missing leaving stitching exposed.
Signature stitching loose and sliding around on cords.
Cord ends not secured - stitching in danger of slipping off cords.
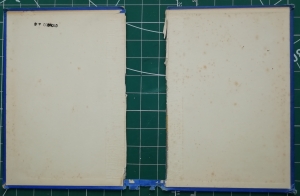
Front end paper loose.
Various stains to front and back covers.
Light foxing to endpapers and tissue guard to frontispiece.
Repair Process
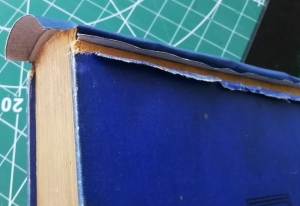
The first step was to remove the remainder of the case, seeing as the spine was already missing. The boards were still attached by a small section of the spine book cloth which makes it easier to gauge the width of the new spine more accurately.
The next step was to inspect the stitching more closely. As suspected from what was already exposed, none of the cord ends were secure, which meant the signature stitches were sliding around with some slipping off - without intervention the whole book would need to be restitched.
In order to tighten the stitching, I sewed new thinner cords alongside the old ones, then knotted them back on themselves.
The old cord ends were then snipped off to reduce the bulk under the new spine.
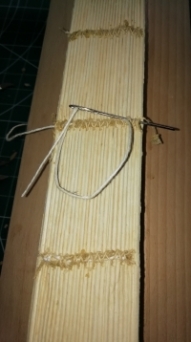
It was at this point I noticed that some of the signature stitching threads had come undone. There wasn't enough left to thread onto a needle, so I knotted a new piece of thread onto this then stitched securely in place.
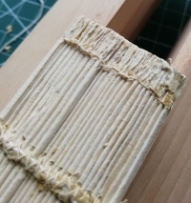
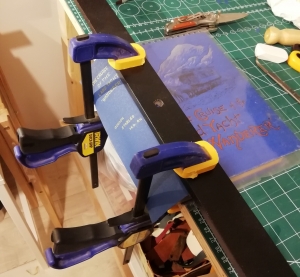
As the cords had been loose, the book had now lost its rounded shape. Normally this would be done by using a rounding hammer and carefully shaping it into the traditional mushroom shape where the outer signatures are bent over to accomodate the casing. This wasn't necessary as they had retained that form, so I just manually returned the shape then carefully clamped it into the lying press.
From here it was simply a matter of applying some glue onto the spine and then laying a piece of mull over the top and gluing that in place too. The mull was held in place deep into the hinge with a rubber band. This part is essential as if the mull didn't go deep into the hinge the case would stick out and the book would l look a mess. Finally a piece of backing paper was applied to protect and support the spine.


In order to attach the book block to the case, the mull is glued onto the inside of each board, and then covered with an endpaper. If the endpaper was significant for example hand marbled, I would lift the paper first then glue the mull under it. However in this case a very thin endpaper had been used and would more likely fall apart when lifting it, so I chose to glue over the existing and apply new endpapers which were of higher quality.
Now for the tricky bit - adding a new spine cover. The owner thought she may still have the old spine so the plan was to provide a temporary new one that the old one could be pasted in top of if and when it was found.
I had a piece of book cloth in a similar shade, so fashioned a new one out of that.
I applied the lettering first whilst the cloth was flat. I don't have the same font as the original (a quick Google of this edition of the book showed how the spine would have looked), so I opted for writing it by hand as it was supposed to be temporary.
The cloth needs some support so a piece of card was pasted to the inside.
This part is never seen, so it wasn't uncommon for book binders to use something unusual like a picture or a story - however, I just sign and date it so that if the book ever needed rebinding again there would be a bit of history there!
I lifted the edge of the existing book cloth so that the new piece could slide underneath it.
This was done by brushing some water onto the edge of the cloth to soften the old paste enough to tease up a few millimetres of the cloth.
I then pared away a layer of the old cardboard to the same thickness as the new bookcloth so the old cloth would lie flat when glued down again.
The next steps were quite time consuming as it meant gluing something in place then waiting a couple of hours in between each step while it dried, in order to achieve the correct shape. Normally this is all done in one go when a full book cloth is applied, so I has to be somewhat creative in achieving the shaped hinge.
I ended up using wooden skewers to hold the cloth in place in the hinge while it dried.
Once the new cloth was fully secured in place, the old cloth was glued back into place and gently rubbed down to leave as smooth a finish as possible.
Some of the colour faded during this process so the whiter parts and thread ends were touched up with watercolour paint colour matched as close as possible.
Finally, I gently cleaned off the food stains and removed the blob of white paint from the main picture.
The whole process took around 4 hours, but spread over several days as this sort of repair has a lot of waiting in between for things to dry.
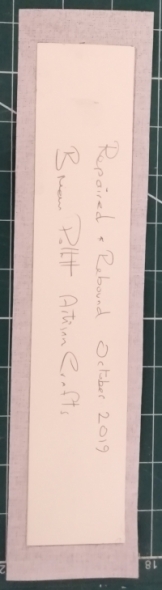
Brian Pollitt Artisan Crafts October 2019.
| Visitor Counter: | |||||||
 | |  |  |  |  | ||